How to update Wordfast Pro
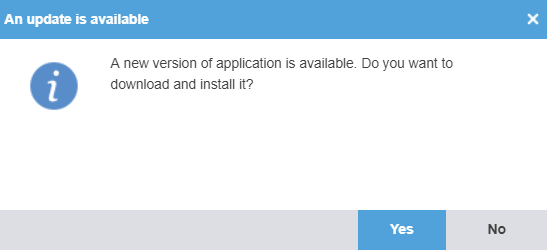
If a newer version of Wordfast Pro is available, you will see a prompt to download it when you launch the program:
In order to update, simply click the Yes button. This will download the latest version, remove the existing one, and perform the update.
In case the update fails to start or is interrupted, you can update Wordfast Pro manually by following the steps below. Do not worry about your projects, TMs or glossaries – the installer will keep them intact. Your licence will be preserved as well.
Windows
- Open the Wordfast Pro download page.
- Click the "Download Now!" button.
- Choose WINDOWS 64-BIT.
- Choose where to save the file.
- Once the download is complete, run the file (named Wordfast_Pro_X.X.X.msi, where each X stands for a version number) by double clicking it.
- Follow the steps in the wizard – they are the same as when making a fresh install.
Updating from a very old version
If you haven't updated Wordfast Pro for a long time, it might be necessary to perform additional steps. Follow the steps below if you still have version 7.1 or lower.
- Export all your TMs and glossaries in the TMX and TBX formats, respectively, to use as backups in case an error occur during the upgrade. Do not store any TMs, glossaries, or projects in cloud-synced/backed up folders as this may corrupt them beyond repair.
- Upgrade to version 7.2.0. Download it from here: https://cdn3.wordfast.com/WFP7.2.0/Wordfast_Pro_7.2.0.msi
- After installing v.7.2.0, open each of the projects in your project list. Opening a project starts the database migration process – a corresponding warning will be displayed. Depending on the size of the TMs/glossaries and the computer's specifications, this may take between 1 minute and over an hour. Do not interrupt this process!
If you see errors such as "Cannot connect to TM" or similar:
- Click OK to open the project.
- Go to the Project TM tab (if the error occurred with a TM) or to the Project Terminology tab (if it occurred with a glossary).
- Remove the TM or glossary.
- Delete or rename the folder containing the TM or glossary using File Explorer.
- Import the TMX or TBX backup created in step #1. This will recreate your TM or glossary.
After step #3 is complete for all your projects, you can install the latest version.
One thing to note is that, starting with version 7.5, Wordfast Pro now has default locations for TMs and glossaries and blocklists (they were previously called "blacklists"), as follows:
- C:\Users\[username]\WordfastPro\memories
- C:\Users\[username]\WordfastPro\glossaries
- C:\Users\[username]\WordfastPro\blocklists
We recommend using these folders. If your try to change this default location, a warning message will be displayed. This is because many users disregarded our warnings not to store their TMs, glossaries, and projects in folders that are synced by apps such as Google Drive, MS OneDrive, Dropbox, etc., which eventually results in corruption and potential loss of the entire resource. Only use alternative locations if you are absolutely sure these locations are not synced/backed up by the above-mentioned programs.
After successfully completing the database upgrade (TM/glossary re-indexing) process, the locations where the TMs/glossaries were stored will contain both the migrated and the backup version of the resource, e.g. "Legal TM en-fr" and "Legal TM en-fr_backup". You can delete the "_backup" folders – but only after checking that the respective upgraded resource works.
